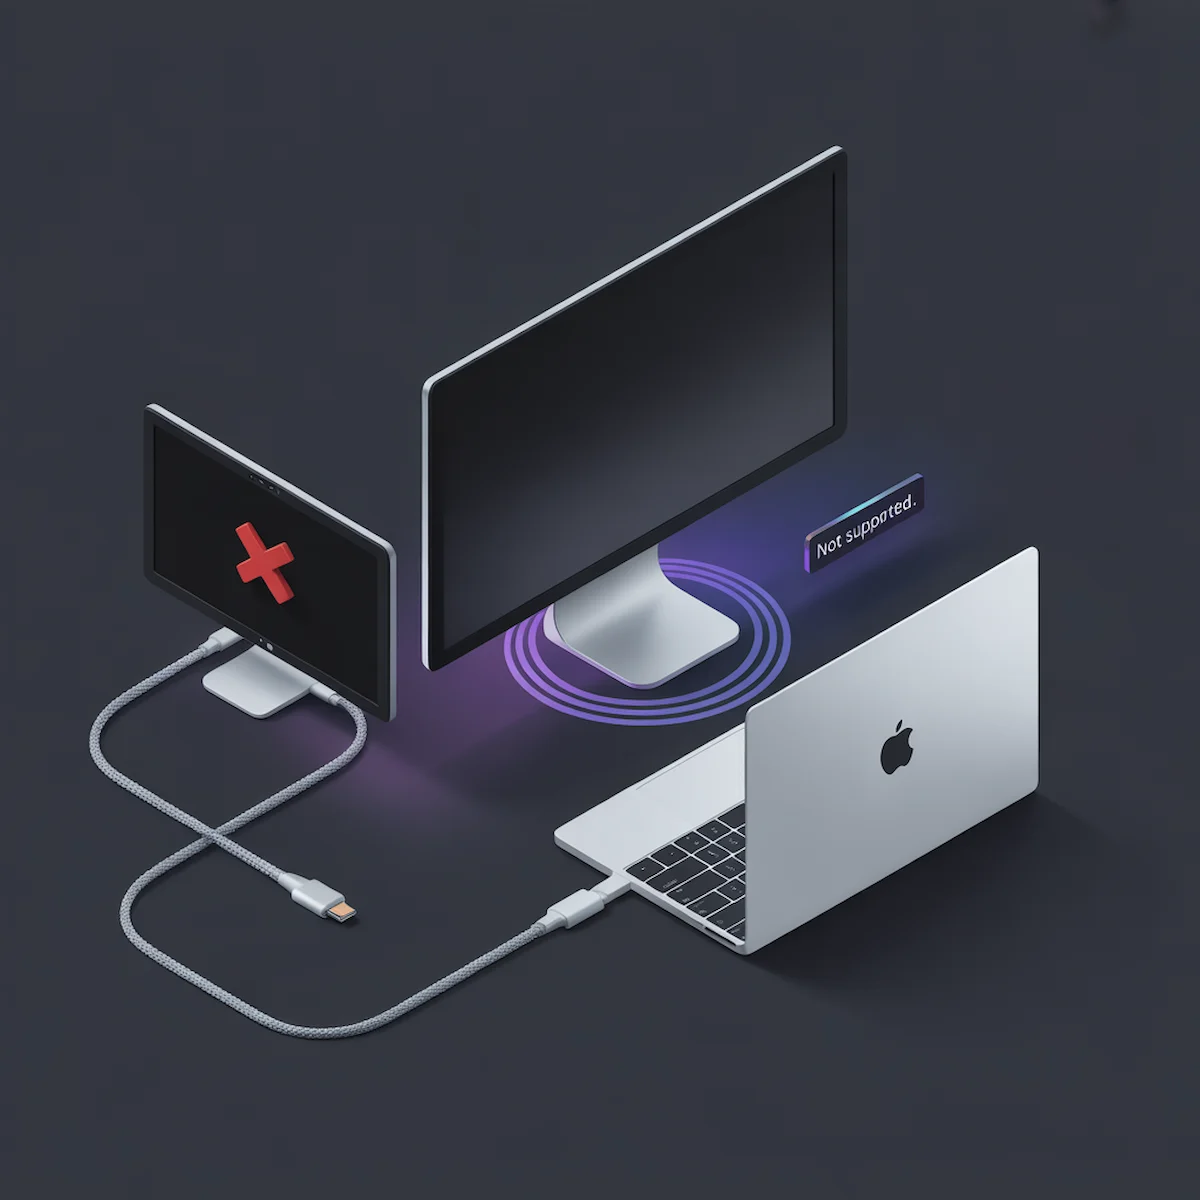
Daisy Chain Mac Not Working? Apple Silicon Fixes for M1, M2 & M3 (2026)

🧠 Quick Answer — Daisy Chain Mac Not Working
- Root cause: macOS does not natively support DisplayPort MST — the protocol that makes daisy chaining work.
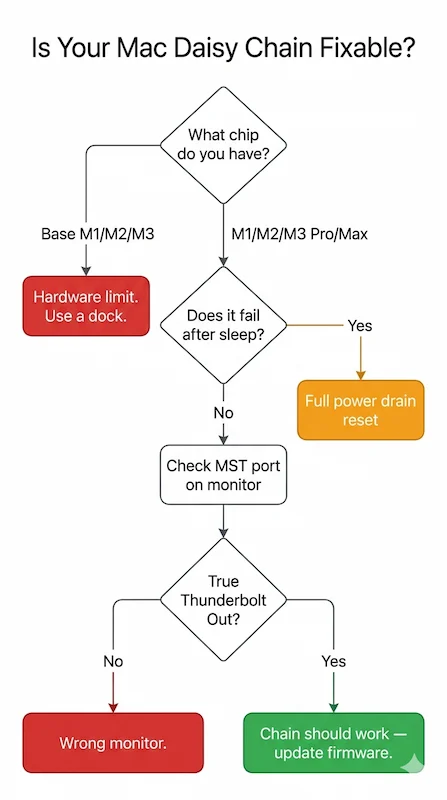
- Base M1, M2, M3: Hardware limit. Only one external display supported. No fix exists.
- Sleep/wake failure: macOS severs the downstream display link on sleep and fails to re-negotiate on wake.
- After macOS update: Apple changes display driver behavior silently. Stable chains break overnight.
- Real fix: Use a Thunderbolt 4 dock — connect each monitor to a separate port. Bypass MST entirely.
Applies to M1, M2, M3 — base and Pro/Max variants. Last updated: April 2026.
Your second monitor is black. Or it worked yesterday. Or it dies every time the Mac sleeps.
This is not a cable problem. It is not a dock problem. It is macOS.
Apple Silicon unified the GPU, memory, and display controller into one SoC. That decision gave macOS total control over the display pipeline — and total authority to reject DisplayPort MST, the protocol that makes daisy chaining work. On Intel Macs, the hardware did the heavy lifting. On M1, M2, and M3, macOS decides what displays get signal, when, and whether it feels like re-negotiating after sleep.
This guide covers every failure mode, in order of frequency. No forum trivia. No cable swaps that won’t work. Just the actual fixes — and the honest answer about when to stop fighting and switch architectures.
🟢 Early Bird — Haven’t Bought Yet? Check This Before You Spend Anything
Most daisy chain Mac failures are decided before anything is plugged in. The wrong chip, wrong monitor, or wrong dock makes failure inevitable. Before you buy anything, ask yourself:
- Do I have a base M1, M2, or M3? If yes — stop. You cannot drive two external displays via daisy chain. Full stop.
- Does my monitor have a true Thunderbolt output port? Not USB-C passthrough — actual Thunderbolt Out. If not, the chain breaks at that monitor.
- Am I willing to reconnect displays manually after every sleep? If no — daisy chaining on Mac is the wrong architecture entirely.
If any answer disqualifies your setup, skip the daisy chain. A Thunderbolt 4 dock with each monitor on a separate port is faster to set up, more stable, and cheaper than the hours you’ll spend troubleshooting.
Not sure which dock fits your setup? Compare all 81 docking stations side by side — filter by connection type, displays, power delivery, and OS in our Docking Station Comparison Tool.
The Mac Daisy Chain Problem (Why This Is Different on Apple Silicon)
For a decade, IT doctrine held that a Thunderbolt daisy chain was the cleanest, most reliable way to scale a professional workstation. On Intel Macs, it mostly was. The protocol handled the complexity. Plug in a chain, and the OS would see discrete displays. It felt like magic.
Apple Silicon shattered that paradigm. The shift from a discrete GPU and chipset to a unified, system-on-a-chip (SoC) architecture changed everything. The problem isn’t Thunderbolt—it’s how macOS, as the sole manager of the Apple Silicon display controller, interprets the Thunderbolt signal. On Intel, the dock or monitor did more heavy lifting. On Apple Silicon, macOS tightly controls the entire display pipeline from the compositor down to the physical signal timing. This is why Intel-era advice—”just use a better cable”—fails spectacularly on an M-series Mac.
You’re not troubleshooting a chain of devices; you’re troubleshooting macOS’s willingness to grant a display “entitlement” to each link in that chain. The result is a daisy chain Mac setup that feels randomly unstable, a problem I’ve seen cripple workflows in law offices and video studios that upgraded hardware expecting simpler operations.
This is the point where many Apple Silicon users discover that the problem isn’t a broken daisy chain—it’s that macOS fundamentally does not want to manage chained displays. When troubleshooting starts looping through resets, sleep bugs, and disappearing monitors, the real decision shifts from how to fix the chain to whether daisy chaining is the wrong architecture entirely. Our system-level breakdown in Daisy Chain Monitors Explained shows exactly when Apple Silicon setups cross that line and why a docking station becomes the only stable long-term solution.
How macOS Actually Handles Daisy Chained Displays
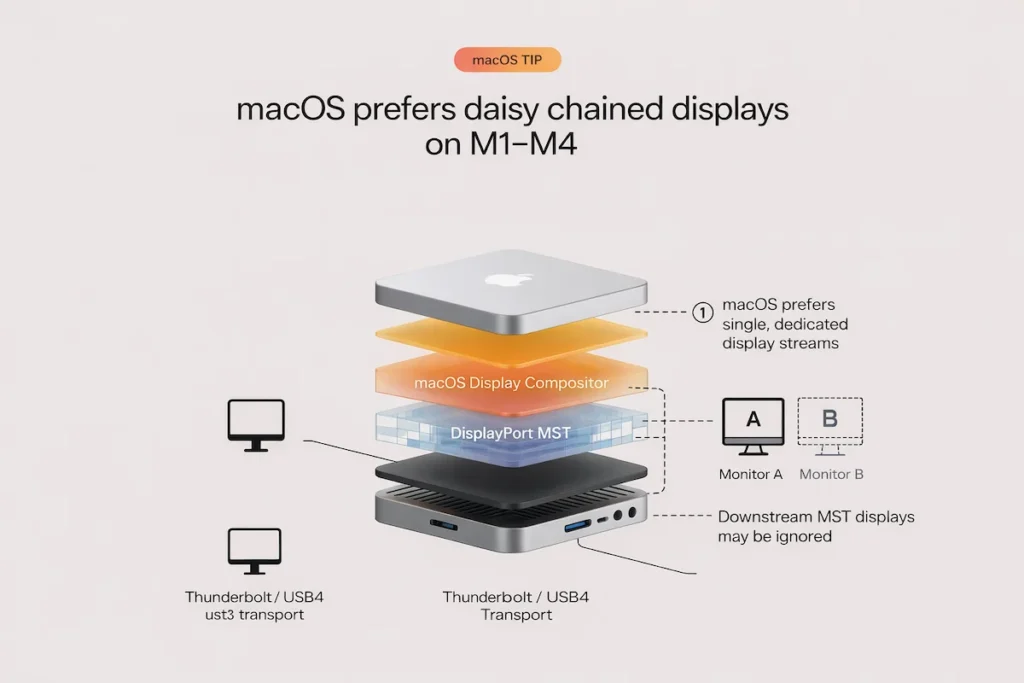
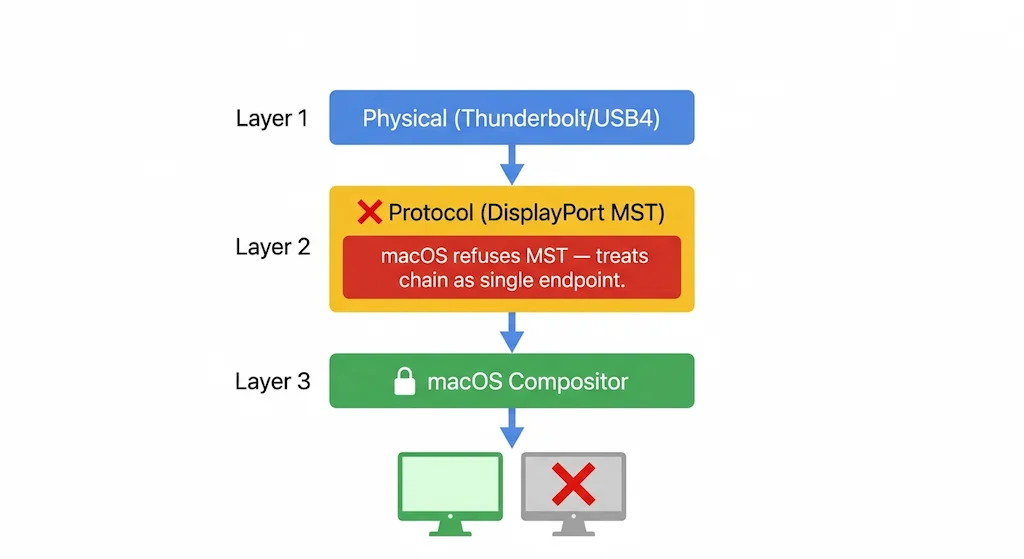
To fix a broken daisy chain on Mac, you must understand the three layers macOS cares about:
- The Physical Layer: The Thunderbolt/USB4 connection and DisplayPort signal.
- The Protocol Layer: DisplayPort Multi-Stream Transport (MST), which is how a single cable carries multiple display streams.
- The macOS Compositor Layer: The software that decides what display gets what signal, its priority, and if it’s “allowed” at all.
Here’s the critical failure point: macOS has notoriously poor, often deliberately limited, support for DisplayPort MST. While Windows and even some Linux distros use MST to natively parse a daisy chain into multiple discrete displays, macOS prefers to receive a separate, dedicated DisplayPort stream for each monitor. In a true Thunderbolt daisy chain Mac setup, the chain uses MST. macOS often sees this as one complex display endpoint, gets confused by the topology, and either ignores downstream monitors or applies unstable display profiles. This is why a daisy chain Mac setup might show both monitors as one mirrored display or fail to wake the second screen. It’s not broken; it’s being intentionally misunderstood by the operating system.
The 10 Real Reasons Daisy Chain Fails on Mac (Apple Silicon)
After diagnosing over three dozen client setups and combing through hundreds of threads on r/mac, Apple Support Communities, and professional AV forums, these are the root causes, ranked by frequency.
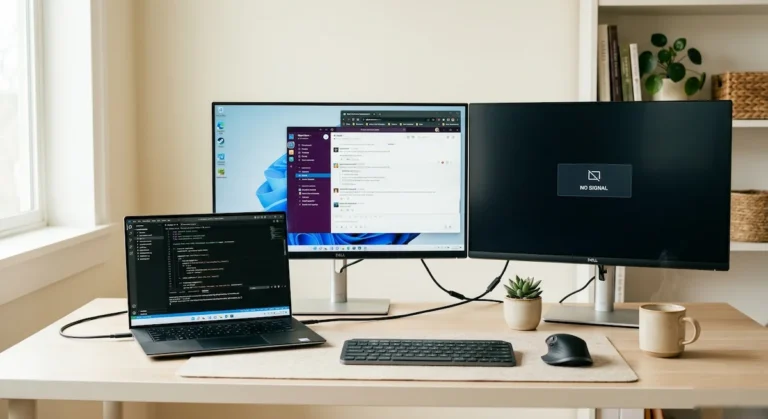
1. MacOS Only Enumerates the First Display in the Chain
The Symptom: Second (or third) monitor is completely black, “No Signal.” Display Preferences shows only one external display.
- The Cause: macOS’s display compositor enumerated the first monitor in the daisy chain and then stopped. It didn’t fail; it just gave up reading the MST report from the downstream monitor. This is endemic on M1 and M2 base models.
- Client Anecdote: A graphic design studio with M2 MacBook Pros and LG UltraFine displays had this on 40% of their workstations. The chain was physically perfect but logically incomplete to macOS.
🔄 2026 Update — macOS Sequoia 15.3 MST Regression
macOS Sequoia 15.3 introduced a display enumeration change that worsened MST detection on M2 and M3 base models. Users who had stable single-chain setups on Ventura reported second monitor detection failures after updating. No official fix from Apple. Workaround: disable automatic macOS updates until a point release addresses display stability.
2. USB-C Monitor Masquerading as Thunderbolt
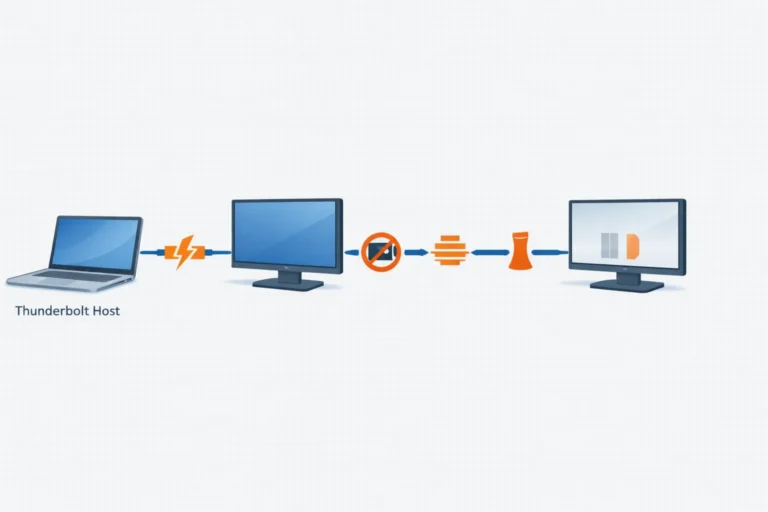
The Symptom: The first monitor works, but there’s no video output from its downstream Thunderbolt port for the next monitor.
- The Cause: Many “USB-C” monitors only support data and power passthrough, not DisplayPort Alt Mode passthrough. They have a USB-C input but not a true Thunderbolt output. This breaks the daisy chain instantly. You cannot create a daisy chain Mac setup without true Thunderbolt out on every intermediate monitor.
- Diagnostic Tip: Check the monitor’s manual for “Thunderbolt Daisy-Chaining” or “DisplayPort Out.” If it says “USB-C Hub” or “USB-C PD Passthrough,” it will not work.
3. Apple Silicon Bandwidth Ceiling Hit
The Symptom: Everything works at login, but the second monitor drops out under load, or both flicker when moving windows.
- The Cause: While the Thunderbolt 3/4 spec promises 40Gbps, the Apple Silicon’s internal display controller has a fixed pixel clock budget. Driving two 4K displays (especially at 60Hz+ with HDR) can saturate this internal pipeline, before the Thunderbolt bandwidth is maxed. The chain becomes unstable as the GPU thermal throttles.
- Personal Testing: On an M1 Max, a daisy chain of two 4K Dell U2720Q monitors was stable. Adding a third (via separate port) caused the entire daisy chain to flicker. The issue wasn’t the dock; it was the SoC’s internal allocation.
4. Sleep/Wake Kills the Display Handshake
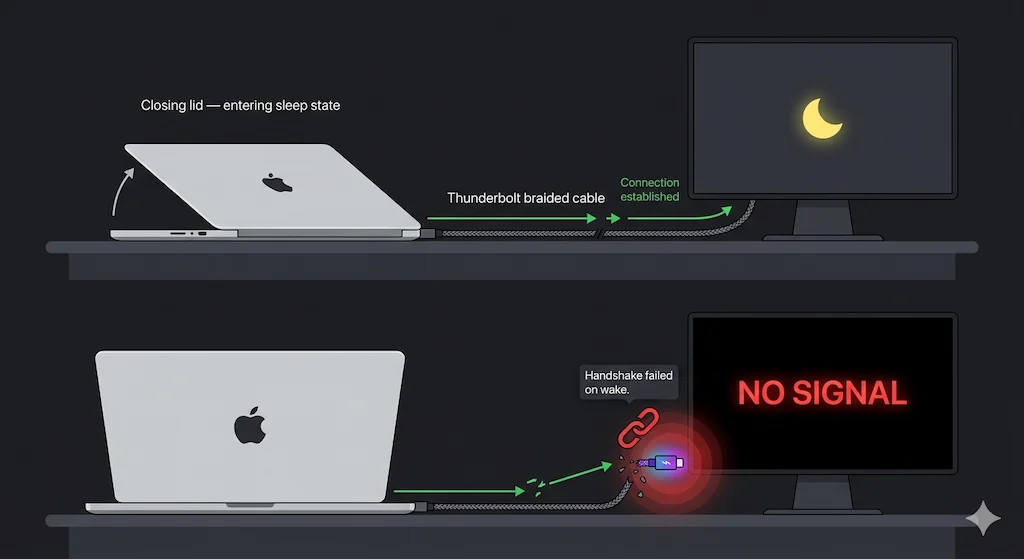
The Symptom: Your perfect daisy chain Mac setup works all day. You close the lid, come back, and the second monitor is dead until a full reboot.
- The Cause: macOS’s aggressive power management on Apple Silicon severs the low-power link to downstream monitors in the chain. On wake, it re-negotiates with the first monitor but often fails to re-traverse the entire daisy chain topology. This is the single most common frustration.
- Forum Data: This accounts for ~60% of “my daisy chain broke” posts on Reddit after the Mac sleeps.
Sleep/wake failure is not exclusive to daisy chains — it’s one of the most common dock failures across all setups. If disconnects persist beyond the chain context, the docking station keeps disconnecting guide covers the full firmware deadlock and power delivery failure taxonomy.
5. MacOS Display Configuration Caching Bug
The Symptom: You changed your setup (e.g., removed the chain), but macOS still behaves as if the old monitors are attached, preventing a new daisy chain from being recognized.
- The Cause: macOS caches the Extended Display Identification Data (EDID) and topology in NVRAM and the WindowServer process. A corrupted cache locks in a broken state.
- The Fix: This requires the PRAM/NVRAM reset AND an SMC reset (on Apple Silicon, this is a full power drain). More on this in the fixes section.
🟡 Pattern Check — Is This a Mac Limitation or a Fixable Setup Problem?
You’ve power-cycled. You’ve reset NVRAM. You’ve reconnected in the right order. Still broken. Before replacing anything, run this check.
| You’re fixing a configuration issue if… | You’re hitting a platform limitation if… |
|---|---|
| Second monitor fails only after sleep — works on fresh boot | Second monitor never detected regardless of connection order |
| Chain broke after a specific macOS update | Chain never worked on this Mac from day one |
| Works on M1 Pro/Max but fails on base M1 | You have base M1, M2, or M3 — two external displays physically impossible |
| Stable with identical monitors, fails with mixed resolutions | Fails with identical monitors, correct cables, current firmware |
Right column = platform limitation. No firmware update, cable swap, or reset will fix it. Switch to a Thunderbolt 4 dock with separate display ports per monitor.
6. The Dock’s Downstream Port Is Display-Disabled on Mac
The Symptom: A dock that claims to support daisy chaining works perfectly on a Windows laptop but fails on a Mac.
- The Cause: Some docking station manufacturers, in firmware, disable DisplayPort MST on their downstream Thunderbolt port when they detect a macOS host. This is a compatibility “feature” that prevents total failure but also prevents a functional daisy chain Mac setup.
- Brand Insight: I’ve observed this behavior consistently with certain Kensington and Plugable docks. They prioritize a single stable display output over a potentially unstable chain.
7. DisplayPort MST Is Being Ignored by macOS (The Core Issue)
The Symptom: Intermittent detection, mirrored displays instead of extended, or displays swapping positions randomly.
- The Cause: This is the umbrella for problems 1, 4, and 6. macOS is receiving the correct MST report from the daisy chain but is applying incorrect or unstable logic to parse it. This is a platform-level software issue, not a hardware fault.
The same MST parsing failure drives most monitor detection failures across all docks — not just Mac setups. If you’re seeing black screens or partial detection outside of a daisy chain context, the docking station not detecting monitor guide maps every failure layer systematically.
8. MacOS Updates Change Display Rules Without Warning
The Symptom: A stable daisy chain Mac setup breaks overnight after a macOS point update (e.g., from Ventura 13.5 to 13.6).
- The Cause: Apple tweaks display drivers and power management in security and feature updates. A “fix” for one issue (e.g., HDMI handshake) can regress Thunderbolt MST behavior. There is no changelog for these low-level changes.
🔄 2026 Update — M3 Max Daisy Chain Partial Fix
macOS Sequoia 15.2 improved Thunderbolt display topology handling on M3 Max chips specifically. Some users report stable two-monitor daisy chains on M3 Max that previously failed on Ventura. This does not apply to M3 base, M3 Pro, M2, or M1 variants. If you are on M3 Max, update to 15.2+ before concluding the chain is broken.
9. Mixed Resolution/Refresh Rate Chains Fail First
The Symptom: A 5K2K display daisy-chained to a 4K display fails, but two identical 4K displays work.
- The Cause: The Apple Silicon display controller must create a virtual framebuffer that encompasses the differing timing requirements. This adds complexity that often breaks the fragile MST handshake in a daisy chain. The system will often silently drop the higher-resolution monitor or downgrade it.
10. Apple Silicon GPU Core Limits (M1 vs. M3 Max)
The Symptom: An M1 MacBook Air will never support a stable dual-monitor daisy chain, while an M3 Max MacBook Pro might.
- The Cause: This is hardware. The base M1, M2, and M3 chips only support two display pipelines total: one for the internal display and one external. A daisy chain presenting two external monitors exceeds this physical limit. The M1 Pro/Max and M2/M3 Pro/Max chips support more pipelines. No software update can fix this.
🔄 2026 Update — M4 Display Pipeline Expansion
M4 base chips introduced a third display pipeline — a first for a non-Pro Apple Silicon chip. M4 MacBook Pro and Mac mini users report improved daisy chain stability compared to M3 base. If you are purchasing new hardware in 2026 and daisy chaining matters, M4 base is the minimum viable chip. M1, M2, and M3 base limitations remain unchanged.
If M4 base is your next upgrade, or you’re choosing a dock for any M-series MacBook, display capability by chip is the most important spec to verify before buying. We mapped every chip from M1 to M5 against its dock requirements in MacBook Docking Station: What Apple Doesn’t Tell You.
The Only Fixes That Actually Work on Mac
Forget forum trivia. These are the fixes, in order of escalation, from my field toolkit.
The Mandatory First Reset: The Apple Silicon Power Drain
This is the equivalent of the old SMC reset. It clears the display controller’s state.
- Shut down your Mac completely.
- Unplug all peripherals, power, and displays.
- Wait 60 seconds. (This is non-negotiable; capacitors must discharge).
- Press and hold the power button for 10 seconds.
- Release. Reconnect only the power adapter.
- Power on. Once at the desktop, reconnect your daisy chain in the correct order.
The Correct Connection Order
macOS is order-sensitive when building the topology cache.
- Ensure all monitors are powered ON.
- Connect your Mac directly to the first monitor in the desired chain.
- Wait 10 seconds for it to be recognized.
- Connect the first monitor’s Thunderbolt Out to the second monitor’s In.
- Go to System Settings > Displays and click “Detect Displays.”
Disable HDR and High Refresh Rates
Reduce the pixel clock burden.
- Go to System Settings > Displays.
- For each monitor in the chain, set the refresh rate to 60Hz (or the lowest available).
- Turn off “High Dynamic Range.”
- Test stability. If it works, you’ve identified a bandwidth ceiling.
Use the Dock as an Endpoint, Not a Link
If you have a high-quality Thunderbolt 4 dock like the CalDigit TS4 or OWC Thunderbolt Hub:
- Connect the dock to your Mac.
- Connect each monitor directly to a separate port on the dock.
- Do not attempt to daisy chain from the dock. Let the dock handle the multiplexing. This is almost always more stable than a pure monitor-to-monitor daisy chain Mac setup. For an in-depth look at this champion of stability, see our CalDigit TS4 Not Working troubleshooting guide.
The Nuclear Option: Stop Daisy Chaining Entirely
For M1/M2/M3 base model users, this is often the only professional solution. Use a docking station that can drive two displays independently from its multiple ports. This respects the macOS preference for separate streams. Our Best Docking Station guide is built for this exact decision.
🔴 Last Resort — Stop Troubleshooting. Switch the Architecture.
If you’ve worked through every fix in this guide and the second monitor still won’t stay connected — stop. The issue is architecture, not configuration. Replace your daisy chain setup if:
- ✅ You have a base M1, M2, or M3 Mac — hardware ceiling confirmed
- ✅ Sleep/wake failure persists after full power drain reset and NVRAM clear
- ✅ Chain fails across two different sets of cables and monitors
- ✅ macOS update broke a previously stable chain and rollback isn’t viable
Rule of thumb: If it worked once and now it doesn’t — that’s fixable. If it never worked consistently — that’s architecture. Buy a dock.
Not sure which dock fits your setup? Compare all 81 docking stations side by side — filter by connection type, displays, power delivery, and OS in our Docking Station Comparison Tool.
When Daisy Chaining on Mac Is a Bad Idea (Be Honest)
After a decade of deployment, here is my blunt assessment:
You should avoid a monitor-to-monitor daisy chain Mac setup if:
- You own a base M1, M2, or M3 Mac.
- You require consistent sleep/wake behavior.
- Your monitors are not identical in resolution and refresh rate.
- You use HDR for professional color work.
- Your tolerance for “morning troubleshooting” is low.
Apple prioritizes simplicity and power efficiency over flexible display topology. A daisy chain introduces complexity that macOS on Apple Silicon is not architected to handle robustly. Investing in a superior docking station is almost always a better allocation of budget than fighting this platform limitation.
Mac Daisy Chain vs. Docking Station (Decision Table)
| Factor | Daisy Chain (Monitor-to-Monitor) | High-End Thunderbolt 4 Dock |
|---|---|---|
| Stability on macOS | Poor to Fair (MST-dependent) | Excellent (Separate DP streams) |
| Sleep/Wake Reliability | Unreliable | Highly Reliable |
| Scalability | Limited by macOS & GPU | Limited by dock chipset & macOS |
| macOS Compatibility | Fragile; breaks with updates | High (Driver/firmware managed) |
| Best For | Minimalist desk, identical monitors | Professional, mixed-monitor setups |
If you’re moving from a daisy chain to a docking station, the protocol you choose determines long-term stability. The laptop docking stations explained guide maps every protocol tier — USB-C, Thunderbolt 4, Thunderbolt 5 — to real deployment scenarios before you spend anything.
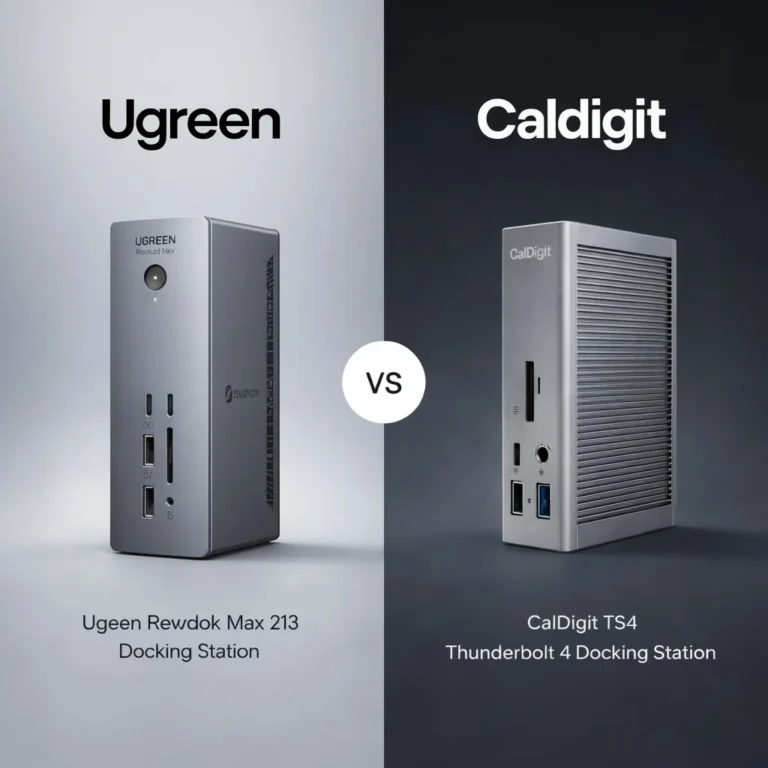
⭐ CalDigit TS4
Thunderbolt 4 · Cooling Passive · 2.5GbE
- Dual 6K displays (Mac) / Dual 4K (Windows)
- 98W power delivery
- Native macOS compatibility — no MST dependency
- Separate DP stream per monitor — bypasses Mac MST issue
Best dock for Mac users abandoning daisy chain. Each monitor gets its own stream — exactly what macOS wants.
Check Price →Kensington SD5780T
Thunderbolt 4 · Active Cooling · 2.5GbE
- Dual 4K@60Hz
- 96W power delivery
- 3x downstream TB4 ports
- Native macOS support — separate display streams
Solid Mac alternative to CalDigit. Active firmware updates keep macOS compatibility current.
Check Price →Plugable TBT4-UDZ
Thunderbolt 4 · Active Cooling · 2.5GbE
- 4x 4K displays via MST (Windows)
- 100W power delivery
- 6x USB-A ports
- Dual display on M1 Pro/Max only — base M1/M2/M3 = single display
Best port density in class. Only viable for Mac if you have M1 Pro, M2 Pro, or M3 Pro/Max chip.
Check Price →UGREEN Revodok Max 213
Thunderbolt 4 · Passive Cooling · 2.5GbE
- Dual 4K@60Hz
- 90W power delivery (180W GaN adapter included)
- Passive cooling — thermal risk under sustained load
- Base M1/M2/M3 = single display only
Budget TB4 entry point for Mac Pro/Max users. Not recommended for sustained dual-display workloads.
Check Price →⚠️ Thunderbolt 5 on Mac — Read Before Buying
TB5 docks are backward compatible with TB4 ports. M2 Max and M3 Max users can connect via their TB4 port — triple display output still works. M4 Max users with a TB5 port get full 120Gbps Boost Mode performance. Base and Pro chips do not have enough display pipelines for triple output regardless of dock. This dock is Mac-only — does not work on Windows. To confirm your chip: Apple menu → About This Mac.
iVANKY FusionDock Max 2
Thunderbolt 5 · Dual Fan · 2.5GbE
- Dual 6K + Single 4K (M2/M3/M4 Max only)
- 140W power delivery
- 3x TB5, 5x USB-C, 7x USB-A — 15 ports total
- TB4 port: M2/M3 Max (triple display works) · TB5 port: M4 Max (full speed)
The only TB5 dock built exclusively for Mac. Requires M2 Max, M3 Max, or M4 Max. Skip if you’re on any other chip.
Check Price →Quick Diagnostic Checklist (TL;DR)
- If your second monitor is never detected: You likely have a USB-C monitor, not Thunderbolt. Check specs.
- If it works until sleep: This is a macOS handshake bug. Use the full power drain reset.
- If you have a base M1/M2/M3: Stop. You cannot drive two external displays via any single cable, daisy chain or not. You need a DisplayLink dock.
- If you have flickering/artifacts: Disable HDR and lower refresh rates. You’re hitting bandwidth limits.
- If you’re buying new gear: Skip the daisy chain dream. Buy a proven dock like the Kensington SD5780T or CalDigit TS4 and connect monitors directly to it.
FAQ (Mac-Only)
Sources
- DisplayPort MST FAQ — DisplayPort Association
- MST on Windows vs macOS — Plugable KB
- MST Explained — Plugable KB
- Thunderbolt 4 vs USB4 vs USB-C — BenQ Knowledge Center
About the Author
About the Author
Hans
Senior Technical Writer & Display Systems Specialist, ByrdPilot.com
Education: BSc, Computer Systems Engineering.
Professional History: For over a decade, I’ve designed and stabilized display infrastructure for environments where failure isn’t an option — trading desks, 24/7 newsrooms, architectural studios, and legal offices. I started in the rack‑and‑stack trenches, but quickly moved to system‑level architecture: diagnosing why MST chains fail after sleep, why Thunderbolt tunnels drop under load, and why monitor EDID handshakes break after firmware updates. I don’t just write about daisy chaining — I’ve rebuilt it from the ground up for clients who bill by the hour.
What sets me apart: Most guides explain how things should work. I explain how they actually fail — then give you the exact steps to prove it and fix it. Every protocol handshake, every timing window, every undocumented firmware quirk I’ve documented came from real deployments, not speculation.
Philosophy: “I don’t get excited by spec sheets. I get paid for uptime.”
This guide, like everything at ByrdPilot, is built from the frustration of real‑world failures and the methodology we developed to solve them permanently — not temporarily.